How to Install Removable Wallpaper (without a divorce!)
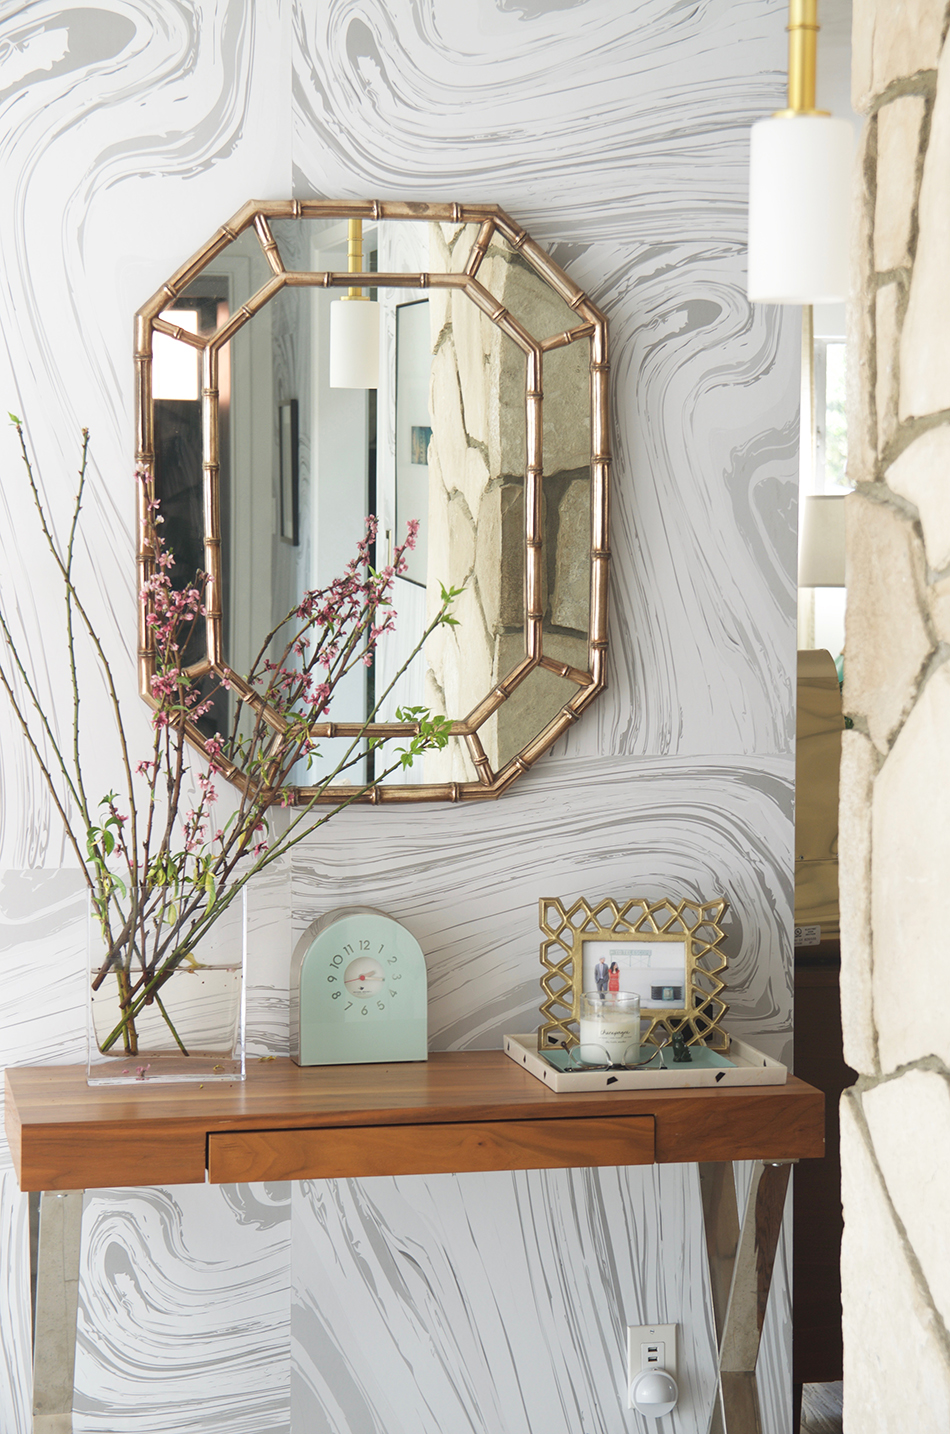
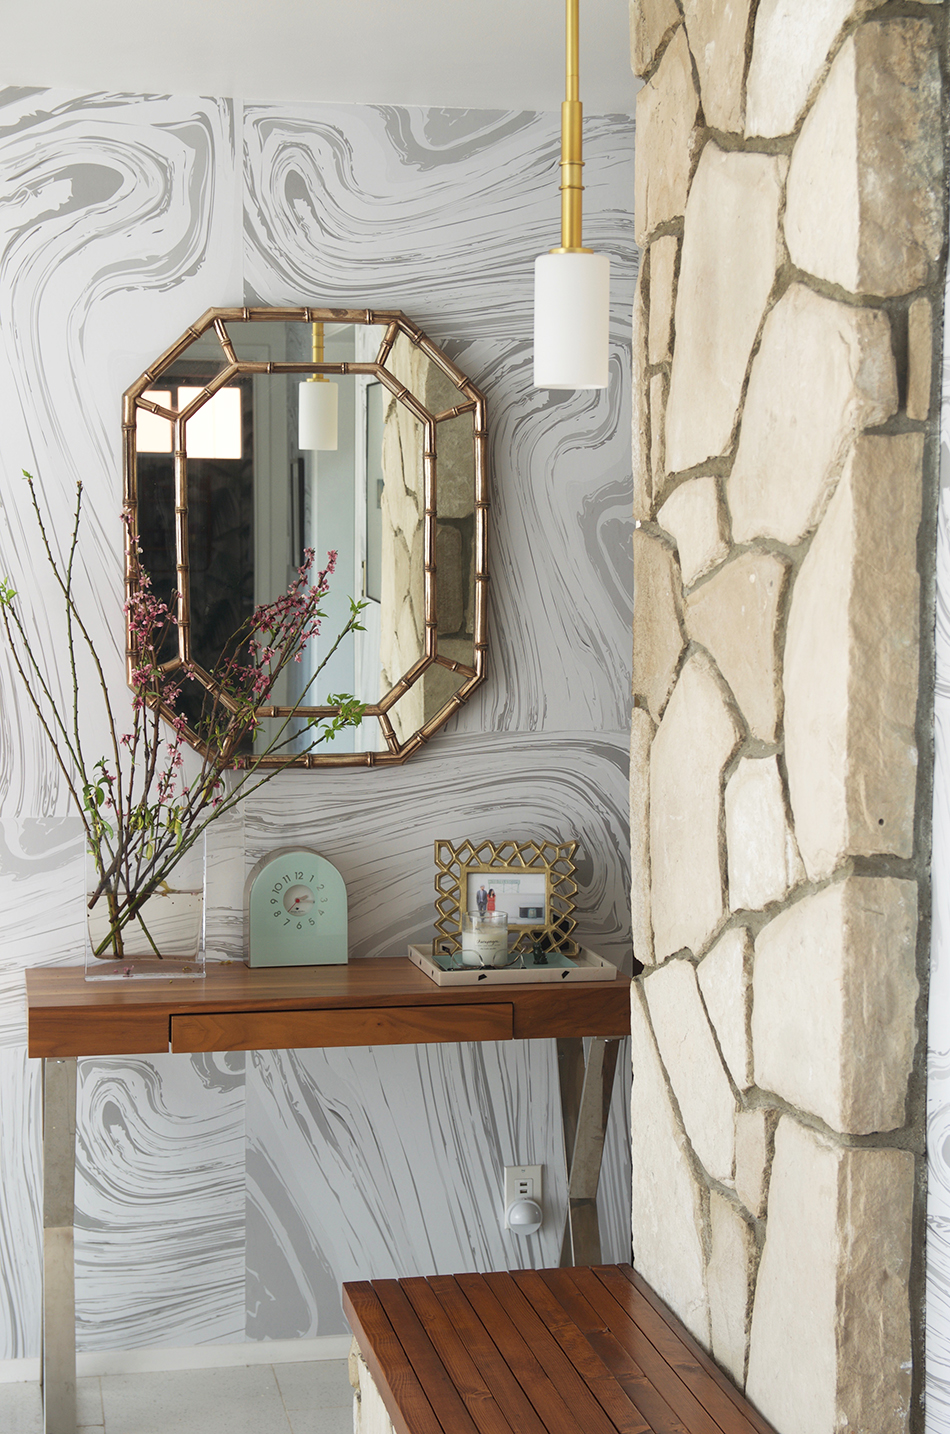
Sometime right after we bought our house, I was scrolling Instagram and came across Drop it Modern and immediately fell in love with the Crystalline Wallpaper. The black and creme had me at the double tap and it was love at first sight! Flash forward to a few months ago and although most of our home renovation was done, I was itching for a last minute project (much to Alan’s joy…not!). I went back to Drop it Modern and saw my Crystalline in grey and knew it would be perfect in our entryway. I worked with Bree, the fabulous owner, and anxiously awaited my wallpaper.
When I announced to friends and family that Alan and I were going to install the wallpaper ourselves, they all laughed and told us “Good luck! You’ll probably get a divorce!” Apparently hanging wallpaper is not fun and can cause serious arguments and fights between couples. Alan and I were out to prove everyone wrong and since we survived 4 months of a massive renovation while I was pregnant (remember I gave birth while our kitchen was still not complete and our house was covered and being painted!).
After this experience, I’ve got some tips for you to install wallpaper! First off, work with removable wallpaper if you’re doing it yourself. The regular stuff gets messy and you can get beautiful results with the removable kind. Second, have a plan in place. Alan and I agreed that he would do the measuring and cutting, while I would apply the wallpaper. He helped hold up the wallpaper while I lined up the paper and smoothed it out. Thirdly, once you’re on a roll, keep going! It’ll be a slow start, but you’ll get it done quickly and actually have fun, I promise!
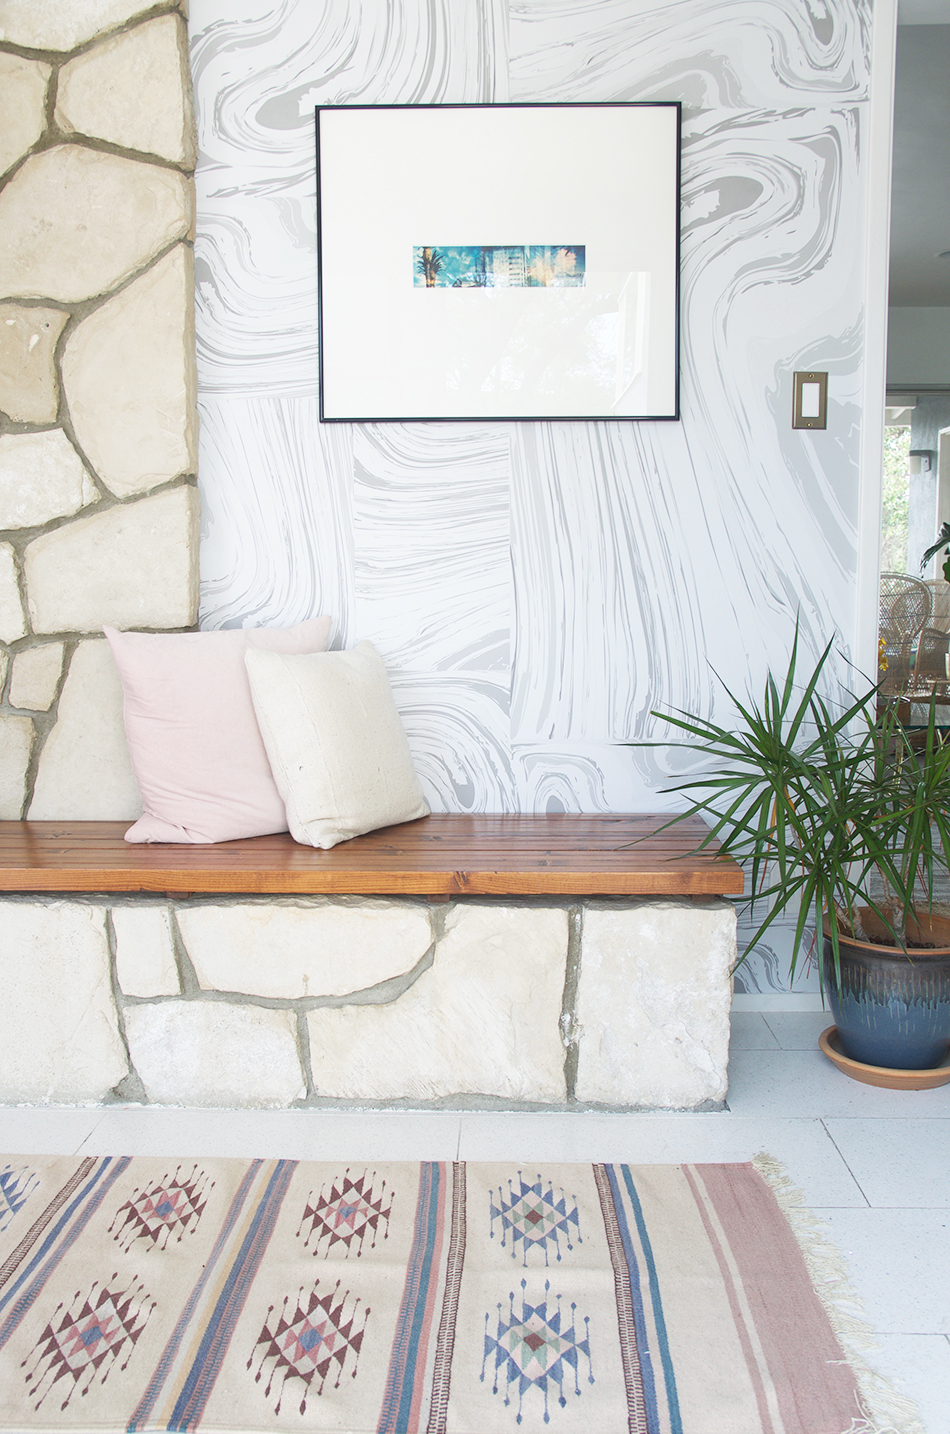
Three months in, I’m still in love with my wallpaper. I catch myself smiling every time I look at the entryway – the wallpaper just brings the whole space together perfectly! And, we’re still happily married!
How to Install Removable Wallpaper
Supplies
Removable wallpaper (I recommend Drop it Modern)
Towel or Rag
Directions
- Prep your walls using TSP. TSP is a powerful cleaner and will remove dirt, oil, and other stuff that can prevent the wallpaper from sticking. Following TSP instructions and allow to dry completely.
- Prime your walls using a wallpaper primer. Again, this will help ensure your removable wallpaper will stick for the long run and allows for a clean and smooth application.
- Unroll and cut the first panel. Tip: if you have the floor space, lay out the first two panels and line them up to get a visual and to confirm how the pattern/repeat will line up.
- Start the first panel against a window or door frame to ensure it’s hung vertically straight. If you don’t have either, then use a level to draw a line on the wall.
- Peel back about 15 inches of back paper and stick the panel to the wall starting at the ceiling. Smooth it using the smoothing tool from the center outward. Use some elbow grease to get out any bubbles.
- Continue to peel the backing paper as you smooth out the wallpaper and work your way down to the floor.
- Repeat steps 5 and 6 for the remaining panels. You’ll need to line up the wallpaper based on the repeat pattern.
- Once you’re done installing all of the wallpaper, trim the top and bottom of the panels with a craft knife.
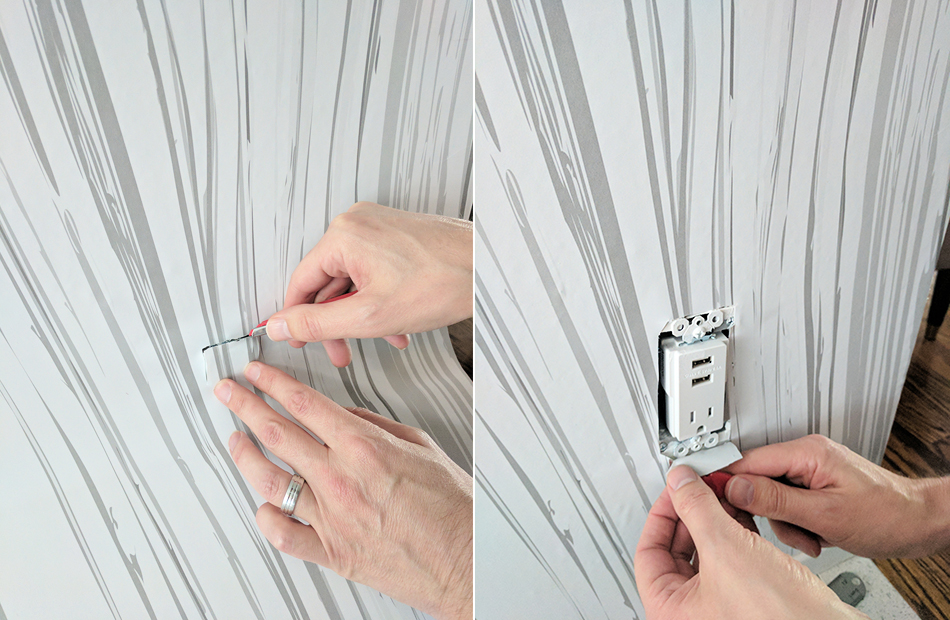
- When installing wallpaper over outlets, wallpaper over the opening. Once the wallpaper is secured, use the craft knife to cut around it. The outlet will protrude out so you can feel and cut around and keep the cut and opening small.
Check out the Slat Wood Bench DIY