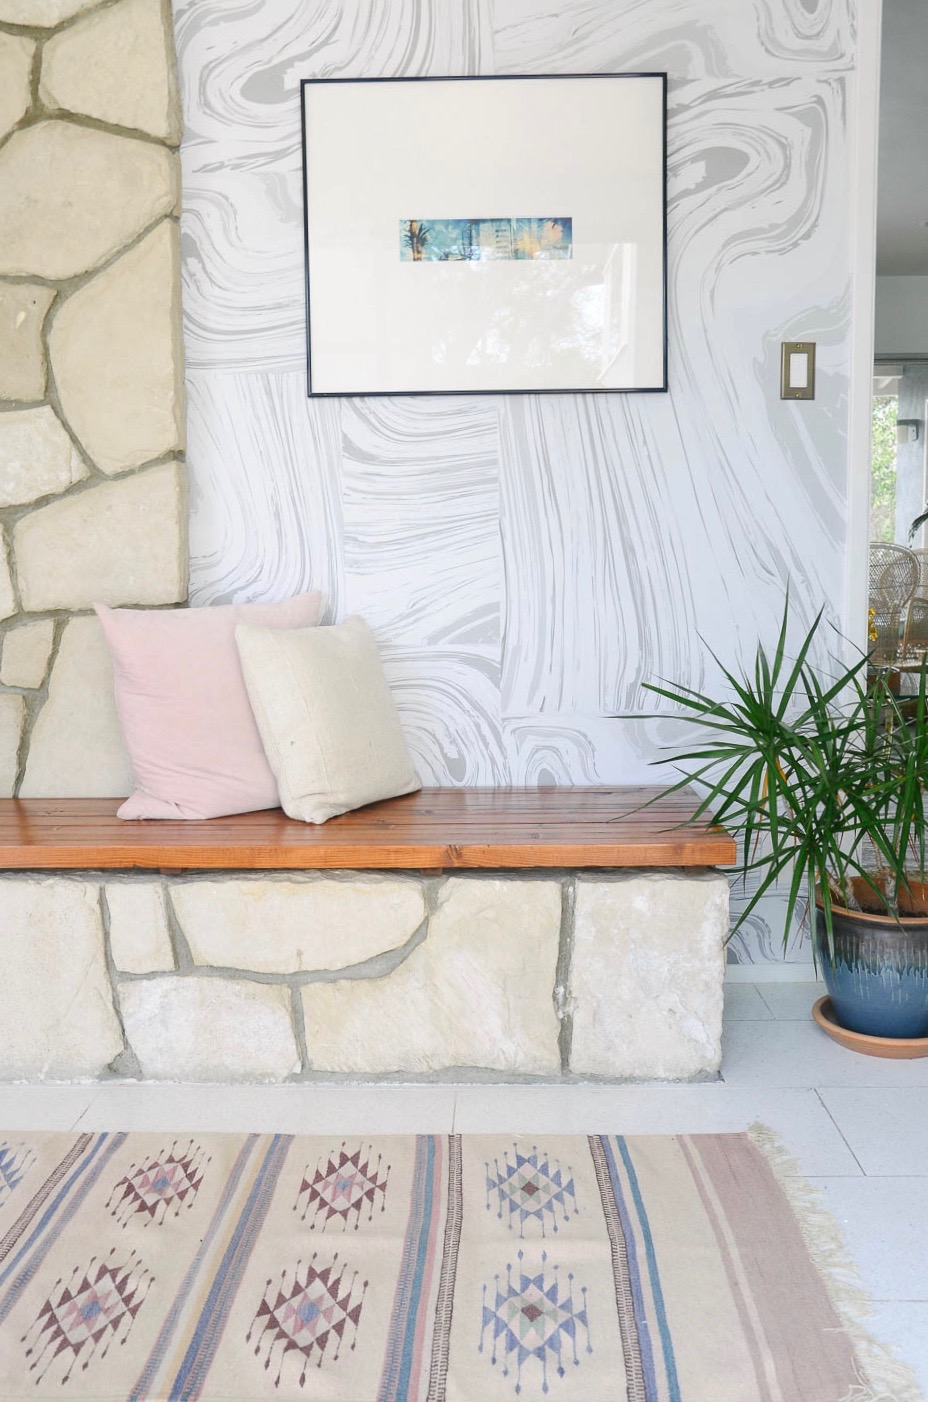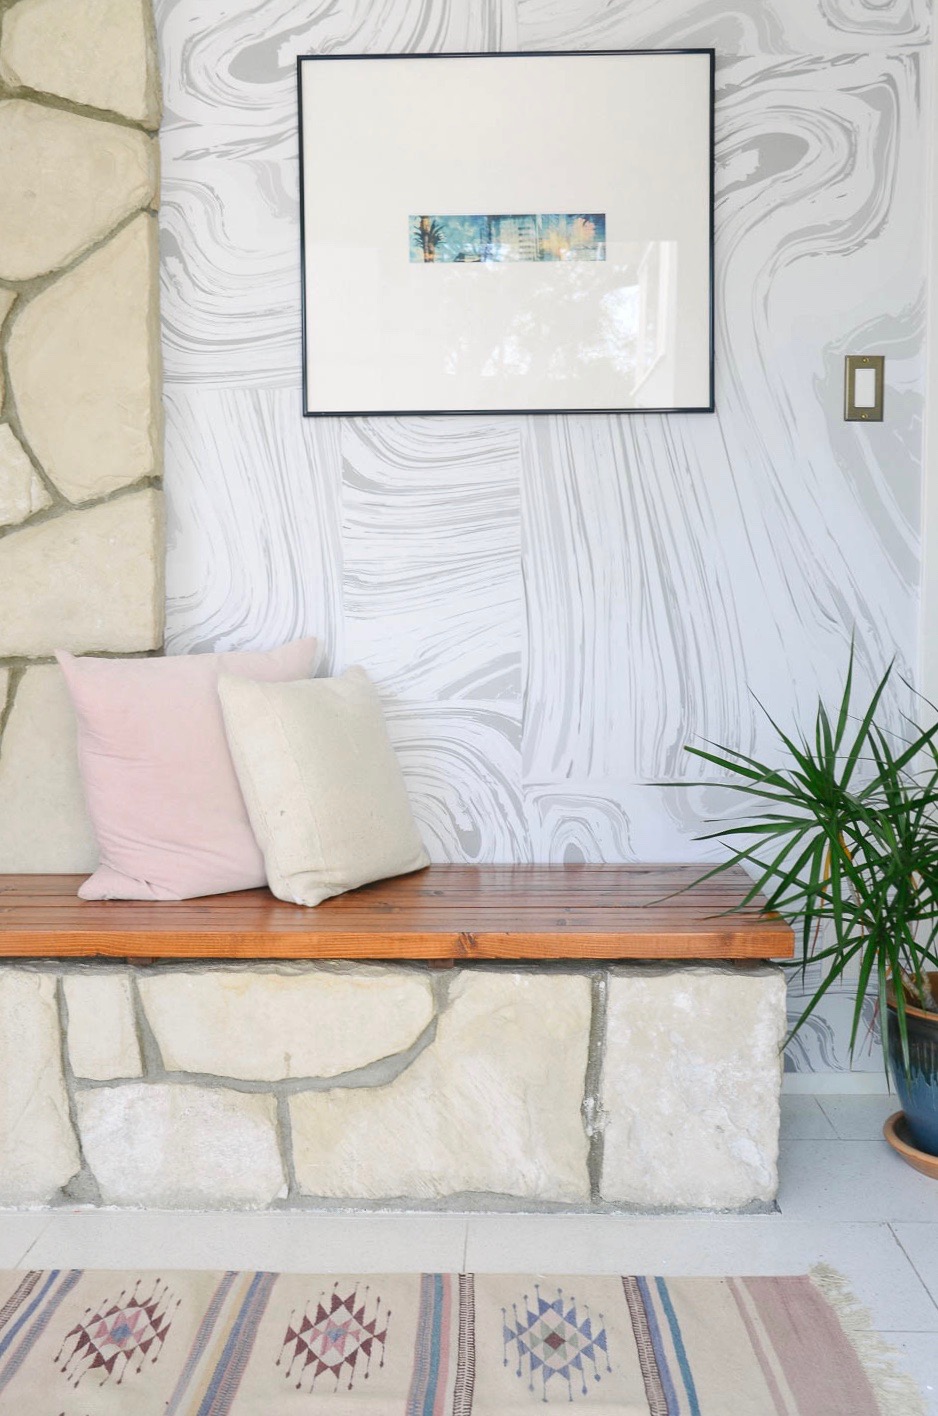
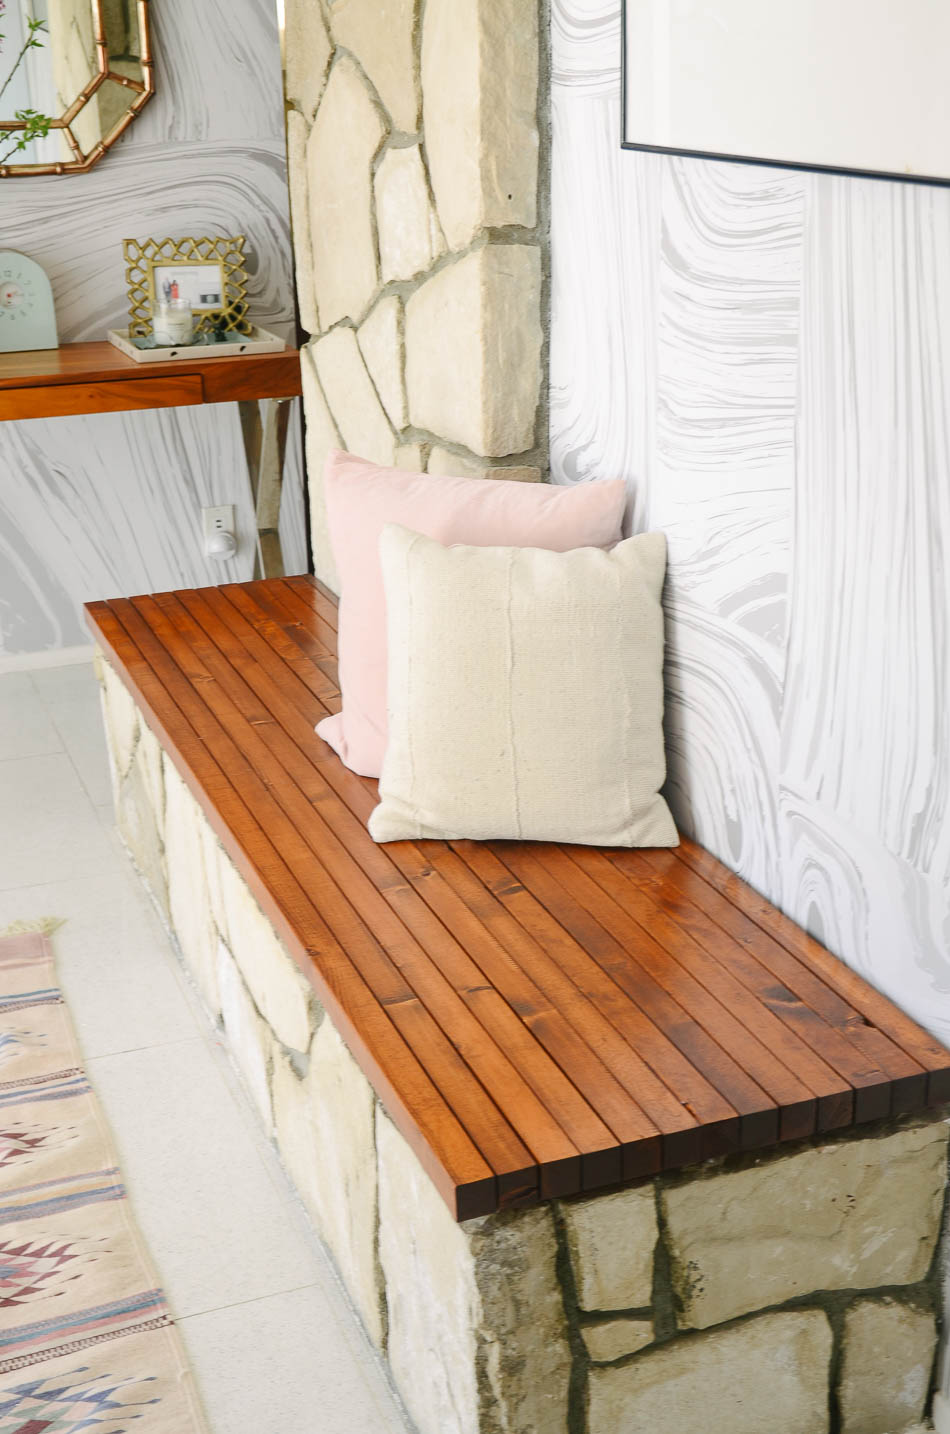
Slat Wood Bench DIY
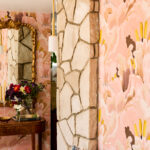
When Alan and I bought our house, where this bench sits was actually an indoor planter. I loved the old school feel but we needed a space to drop our stuff when we come home after work. As a temporary fix, Alan pulled together some 2x4s to cover up the planter. Both of us are perfectionists and since this is the first thing people see when they come to our house, we needed a nice fix. This slat bench DIY is an easy weekend project and is 100% handsome, don’t you agree?
I asked Alan to pull together drawings and the step by step guide (I’m so glad he’s putting that architecture school degree to blog use- ha!).
-What you need-
Wood – Douglas Fir 2x2s and 1x2s. Tip: Douglas Fir is a nicer wood than typical White Pine, and will look better.
Pennies
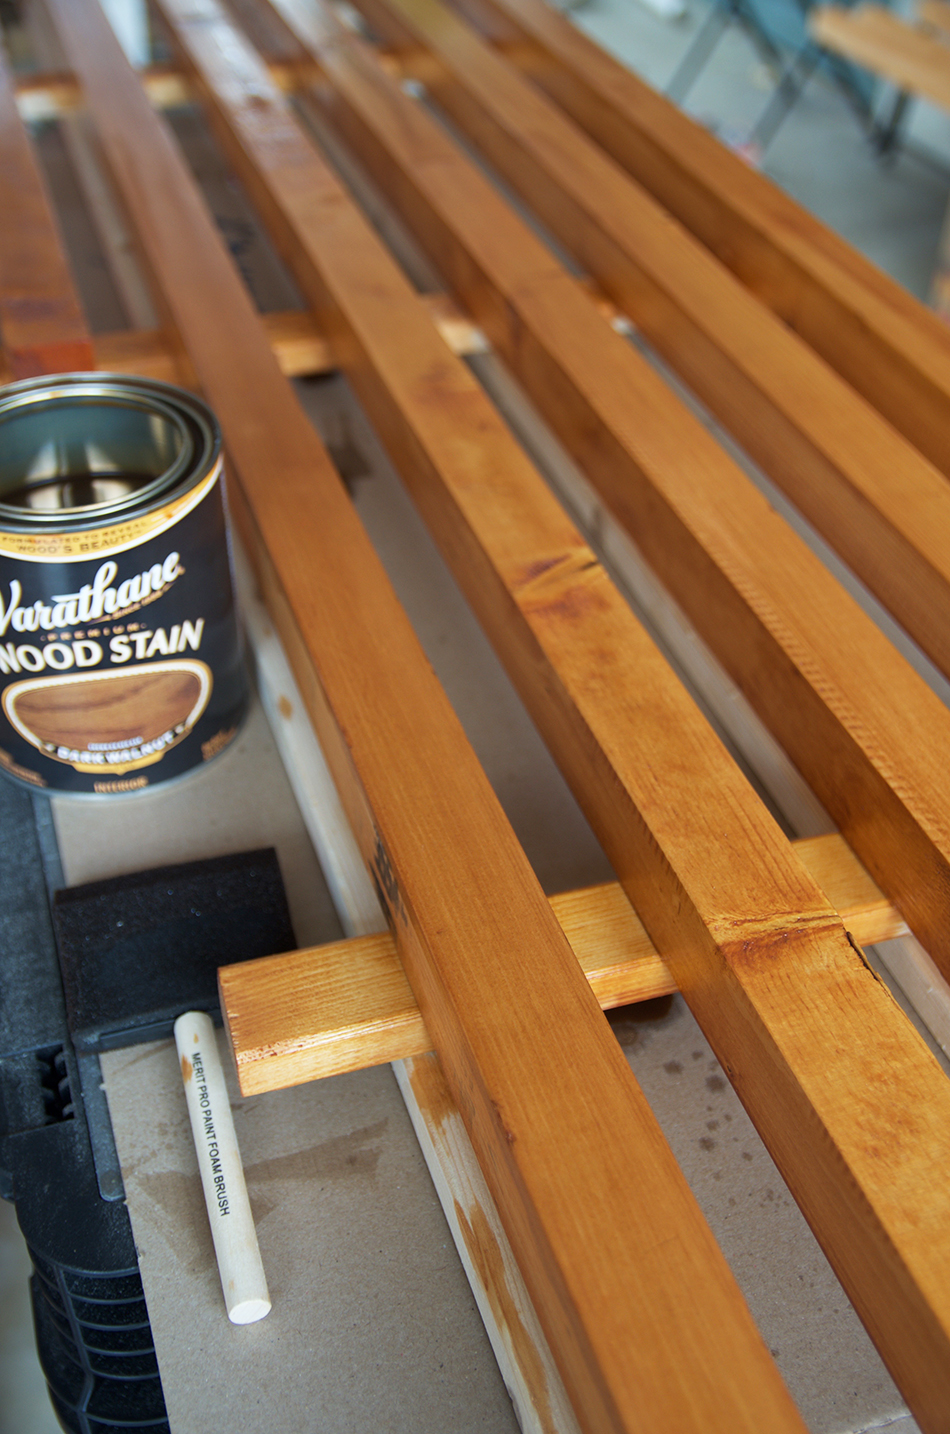
Wood Stain (we used Dark Walnut)
Sandpaper (150 grit or higher)
-Steps-
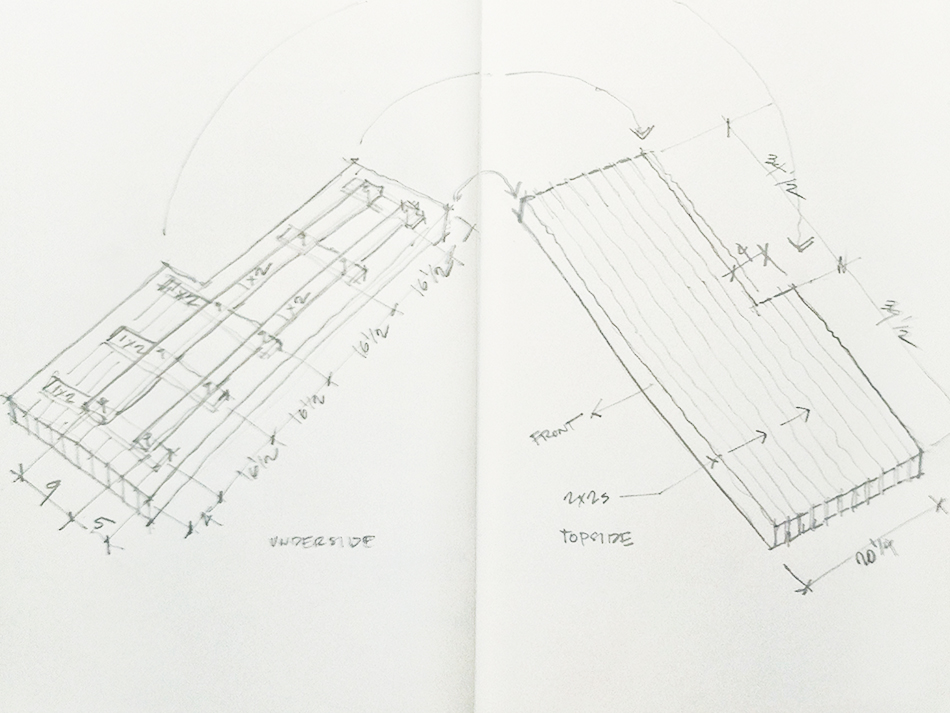
Measure out the dimensions for the bench and pull together a rough sketch.
Based on measurements, pick up enough 2x2s, plus extra 10%. Ask the lumber yard to pick out the straightest pieces. Unless you have your own chop saw set up, also ask the lumber yard to cut the 2x2s to length so you get them all exact. Keep the scraps, as you’ve already paid for them and you can use them to prop up the final pieces and test stains.
To get that slight gap, place pennies between each 2×2 when you clamp them together.
On the underside of the bench, the 2x2s are held together with 1x2s running perpendicular to the 2x2s. Make sure to get the 2x2s aligned by using a large square. Drill pilot holes and screw every other 2×2 into place. Tips: By screwing in every other 2×2, you’ll be able to stain every surface and won’t have any splotches of unstained wood peeking through.
Test out the bench to make sure everything fits right before you start staining.
With every other 2×2 screwed in, start staining the bench, including the loose 2x2s.
When you’re done staining, start applying the polyurethane. Before the final polyurethane coat, install the remaining 2x2s. Lightly sand the bench by hand to eliminate any brush strokes and apply the last coat of sealant.
Install your bench and enjoy! Tip: You can use this tutorial to create a standard bench with legs.
Sources: Wallpaper from Drop it Modern | Vintage Rug (similar) | Vintage Pillows